Plating Saga
My intention in the beginning was to have a professional plater complete the nickel plating of the
front suspension pieces. And, indeed, I made good on the intention on my side. I drove the parts down
 to a plater in Fayetteville, North Carolina — all sixty-some pounds of them. I was hoping that
I'd be able to get an estimate and shake hands on the deal when I was there. I wasn't in any particular
rush, especially since I has seen on the web that this particular plater "took his sweet time."
I ended up leaving the parts in the Rubbermaid container, because the fellow in back was mixing chemicals
and couldn't break away to look at the parts. The time for the project was "six to eight weeks," a
little longer than I had hoped but I would still have the parts in the summer. The estimate would be
available Monday, I was told. It was Friday, so no problem.
Monday, I called. No estimate, but surely Wednesday. Wednesday, no estimate. Friday, nada. I waited another
week for the estimate. Finally, thirteen days after I had dropped the parts off, I drove down to fetch them.
The estimate wasn't available, and there was mumbling on the telephone about the sandblasted parts being "too rusty."
I figured that I would take a shot at plating larger pieces. If I messed things up, I could always send
them off someplace other than Fayetteville.
Believe it or not, I was able to use the Caswell nickel plating kit that I had used for the smaller
pieces. It was mainly a matter of finding plastic containers that were big enough for the part and that
still did not have too great a volume so that my supply of nickel plating solution wouldn't cover the part.
The toughest part to manage was the "upright," which is a long enough part but also has a depth because of
the fittings for the top and bottom ball pins, going in one direction, and the hole for the stub axel, going
in the other.
I thoroughly cleaned the parts using the degreaser and removed any remaining rust — there was a little left,
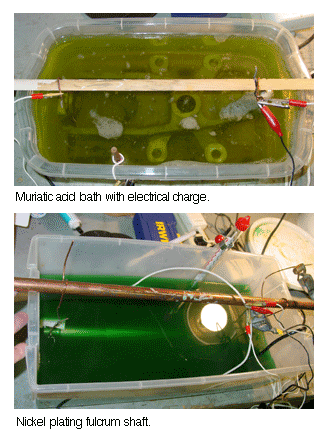
I must admit. I used the strong muriatic acid bath (one part muriatic acid to two parts tap water) and electrical
charge to remove the remaining rust. The negative charge goes on the place you want the rust to go (the sacrificed
steel part) and the positive charge goes on the part you're cleaning. The top photo shows the upright being cleaned.
Plating itself was a little trickier, since I had to do the agitation of the nickel plating solution by hand. Since
space was cramped, a bubbler or other agitation device wouldn't fit. I used a plastic spoon or sometimes just jostled
the part itself. The key is not to let any bubble form on the surface, since the nickel will then pit. Also, especially
in the case of the upright, you have to place the piece in an orientation that will not allow the collection of
bubbles, since the nickel won't adhere to the section where the bubbles collect.
In the close quarters of the smaller container, you also have to watch out for "gassing" which seems to occur when
the piece being plated is too close to the nickel anodes.
As for electrical sources, I used three AC-DC converters and, for very large parts, an old Sears battery charger. I
doubt any other plating than nickel would have worked, since nickel plating seems to be pretty forgiving in matters
of electricity. Zinc plating has been far fussier, I've found.
In the end, the nickel plate really worked well on the front suspension parts, but at the cost of considerable tedium
and fussing with containers and chemicals. Plating took weeks. After everything was plated, I sealed the parts
with a two-part clear coat made for bare metals. The suspension should be in good shape for a long while.
Pictures below show the parts as they looked in April before I tried to have them plated. The picture below that
one shows the newly nickel plated parts. They shined up nicely!

