Cylinder Head Gold Paint
 When my dad was here, we inspected the tappets that accept pressure from the cams. One of these
 appears to have been damaged either by dirt or by corrosion. The surface of the plate where the cam touches
has been pitted. This will probably have to be replaced, since a roughened surface like
that will certainly wear the cam and also be significantly weakened itself. The other tappets show almost no wear at
all. My dad says that the cams bear the most pressure of any parts in an engine. They look to me to be models of
precision and efficiency.
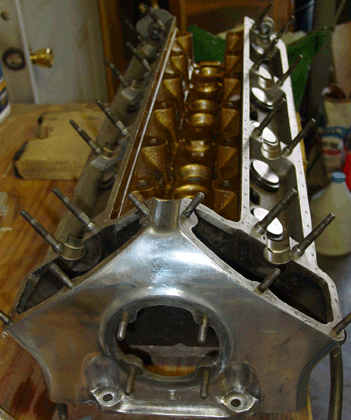
A previous owner of the car seemed very happy with gold paint on the cylinder head and sprayed the entire outside.
From what I can tell, only the area between the value covers and behind the cover over the timing chain sprockets
was painted gold, the rest either left aluminum or polished. I removed the gold paint from the timing chain sprocket
area, and prepped the rest by removing as much as possible of the gold paint. No chemical strippers were used, since
I didn't want to have to worry about unfortunate reactions with aluminum.
The gold paint I used was the "Oldsmobile Gold" engine paint from POR-15. From what I could tell, there was no difference
in color from the paint in place on the head when I took possession of the car, which is certainly not to say that
it was an original color. While I was removing paint I did notice (with some momentary excitement) that a "pumpkin
orange" color lurked beneath the grime, but I'm assuming now that this was discoloration due to age or heat or both.
The reason for the excitement? There are rumors, denied by Jaguar, that at least some early 3.8 liter engines were fitted
with cylinder heads sporting a pumpkin orange paint.
Nickel Plating Small Parts
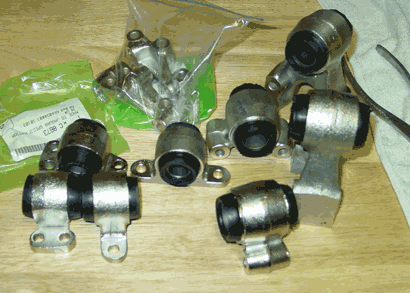
Since I want to install the front subframes fairly soon, I decided I would go ahead and get a nickel plating kit from
 Caswell Plating and do the front suspension mounting brackets. The brackets fit into the subframe and really need
to be installed at the time when the subframe is fitted. The pieces have surface area below the 16-square-inch
per ampere of current that nickel requires. I was able to cobble together DC power sources to make about an amp, so
16-18 square inches was about the limit.
Plating nickel is indeed easier than plating zinc. The electrical charge doesn't have to be quite as precise, I
think, for nickel. And, perhaps, experience counts a bit in plating. I was very pleased with the results.
Although Caswell suggests plating nickel for 60 minutes to get a plate that is for automotive applications, I
went ahead and increased plating times to between 80 and 90 minutes. As with zinc plating, surface preparation
really counts. I had already sand-blasted the suspension pieces, but just to make sure that I cleaned up all rust
 and old plate, I submerged the pieces in a "pickle" containing one part muriatic acid (hydrochloric acid) to two parts
tap water. Then I attached the negative lead from a AC-DC converter to a sacrificial piece of steel (in my case an
old drill bit) and the positive lead to the piece I wanted to clean.
The process of completely cleaning takes several minutes and I imagine that really rusty pieces would take longer.
I wouldn't leave the piece in the acid with electrical charge unattended or you might dissolve the piece. I
generally took the piece out, buffed the faces with a
wire wheel, and returned the piece for a short bath in the acid mixture to remove whatever flash rust might have
appeared during the buffing. Then it was a matter of following the Caswell instructions, and of course adding
some time to their recommended plating session. I did notice that the acid bath sometimes made the surface of the
pieces rough, and so the buffing smoothed things out.
Bushes Installed (with the Ray Livingston Method, Modified)
In a recent discussion on the Jag-Lovers E-type forum about bush installation, Ray Livingston provided a
sensible way of doing the job. (As a matter of fact, Ray seems to be full of sensible solutions to problems
one encounters with Jags!) His solution involved a pipe with an inner dimension slightly larger than the outer
dimension of the bush, a threaded rod, nuts, and washers. Basically the Ray Livingston Method was simple: you
fit the bush to the open side of the mounting bracket, slide the threaded rod through the pipe, then the bracket,
and finally through the hole in the bush. Put washers on both ends of the rod, followed by nuts, and then tighten
the nuts to squeeze the bush (sprayed with silicone as a lubricant) into the bracket and finally slightly into
the pipe on the other side of the bracket.
Simple, elegant, and cheap.
Of course, if you have a big honker bench vise, you won't need to use the threading bits. But Ray surmised that
pulling the bush through with more pressure on the centermost parts of the bush would probably make the process
easier. I discovered that he was right. Also, the Ray Livingston Method could probably be used with mounting
brackets still on the car — while hauling a car to a vise or vice versa would be a bit more difficult.
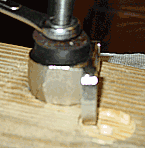
My approach to bush installation was the Ray Livingston Method, Modified. Instead of pipe, I used holes drilled
into a stout piece of wood and instead of threaded rod, I scrounged up a nice long carriage bolt that I had
previously used in a press.
The holes that I drilled were 1 1/2 inches (for the larger brackets) and 1 1/4 inches (for the smaller). Two of the
smaller brackets — I can't remember now if they're the for the upper or lower fulcrum shaft — are attached
 to the frame with three bolts that go into a fitting attached to the frame, sometimes slightly spaced with shims.
These three-bolt brackets won't lie flat on the surface of the wood, so I made a slight indent with the drill bit
so that the piece would lie flush to the wood at the point where the bush was inserted.
I found that the bushes went into the larger brackets quite easily. The smaller brackets were a bit more of a
challenge, since the bracket tended to slip into the hole in the wood, setting the pulling force a bit awry. This
was a rather minor challenge, though. Once things were set, the bush slipped right in. You do have to fiddle a bit to
get the bush to go in so that about the same amount of rubber appears on each side of the steel bracket. This
sometimes means pulling too far and having to remove the piece, turn it upside down and pulling the bush back a bit.
The shop manuals seem to suggest that a man with a firm hand can install bushes. That is not the case, even with the
soap-water mixture that Jaguar then recommended to lubricate the bushes. You need a device. And use silicone instead
of soap. Silicone doesn't harm the bush (at least the ones I got), and it won't promote rust on the bracket.
The bushes I got are apparently "Metalastic." At least they're labelled as such.

